An engraving depicting officers of the shogunate, who are adorned with a combination of western and traditional clothing and armaments. Source: Public Domain
An ink drawing depicting the Battle of Toba-Fushimi, in which Loyalist cannoneers and riflemen fired upon the assembled Bakufu army. Source: Public Domain
Another depiction of Toba-Fushimi. The melee troops from the shogunate can be seen charging across the gap wielding swords and spears while the Loyalists are arrayed in semi-Napoleonic lines. Source: Public Domain
An engraving depicting the Sakai Incident, in which twelve French sailors were killed by Loyalist peace officers. Source: Public Domain
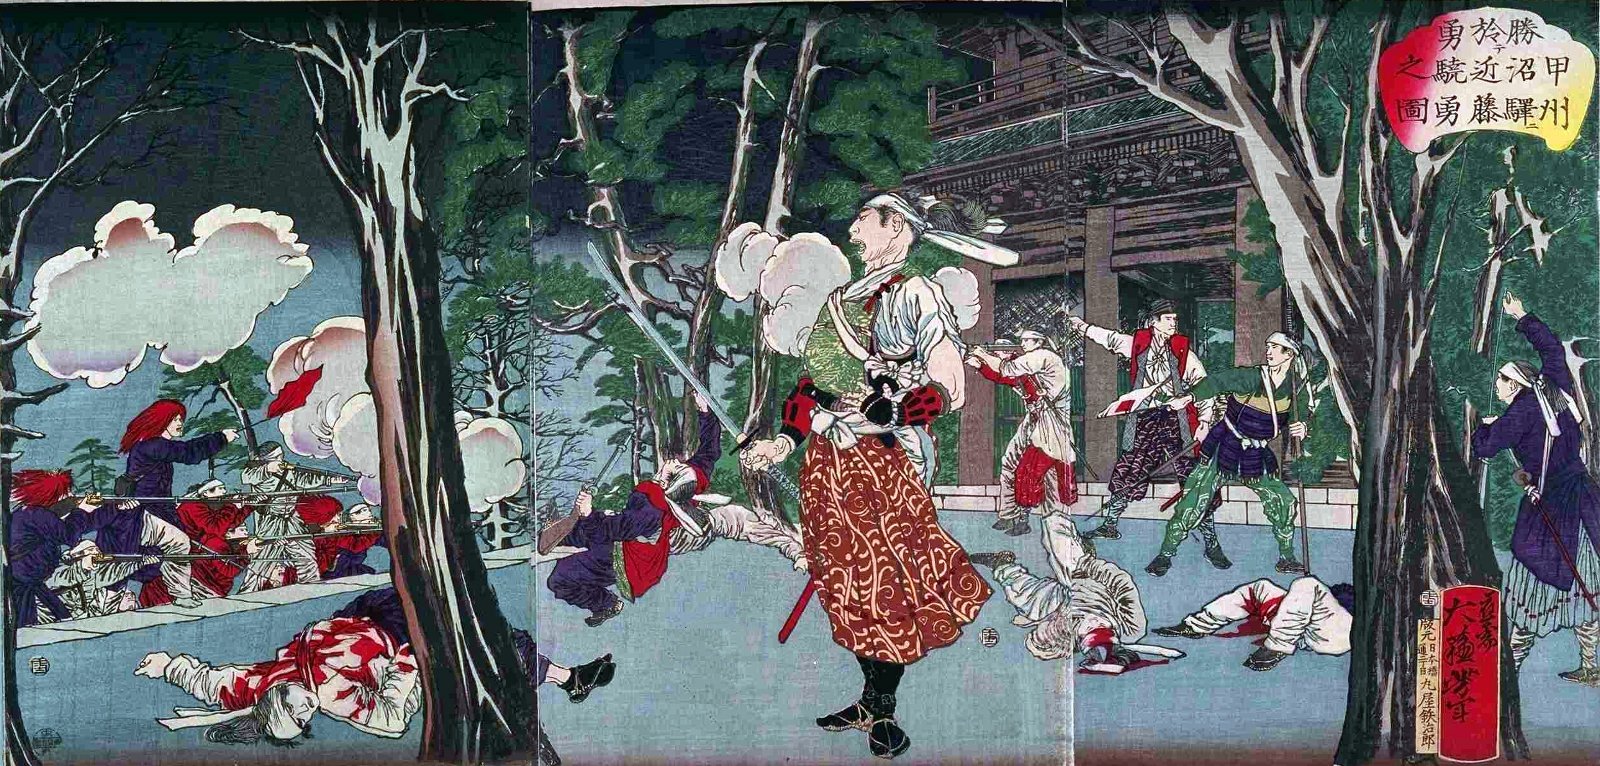
A triptych painting of Kondo Isami (center), the leader of the Shinsengumi who led Bakufu forces at the Battle of Koshu-Katsunuma, which ended in disaster for shogunate troops. Source: Public Domain
One of the actual mortar cannons used by Loyalist forces in the Boshin War. To its right is the shell that would have been loaded and fired. Soruce: Uploadalt, CC BY-SA 3.0, via Wikimedia Commons
A map depicting the various battles of the entire Boshin War. We will cover some of these next season, so spoiler alert I guess. Source: Hoodinski, CC BY-SA 3.0, via Wikimedia Commons
An illustration depicting the marshaling of forces on behalf o fthe Ouen Reppan Domei, or “Northern Alliance,” which would continue fighting the Boshin War after the Emperor’s entry into Tokyo (formerly Edo). Source: Public Domain
A photograph of the leaders of French and Japanese pro-Bakufu (or perhaps more accurately, anti-Loyalist) forces which would continue resisting imperial restoration. In the front row, second from the left, is Jules Brunet, a french officer whom we will discuss in more detail next season. Source: Public Domain


Recent Comments